How to setup redux store using redux toolkit Part 1
- install below mention library
- npm install react-redux or yarn add react-redux
- npm install redux or yarn add redux
- npm install @reduxjs/toolkit toolkit or yarn add @reduxjs/toolkit
2. createSlice
A function that accepts an initial state, an object of reducer functions, and a “slice name”, and automatically generates action creators and action types that correspond to the reducers and state.
For Example

const initialState = {loading: false };
const loadingSlice = createSlice({
name: ‘loading’,
initialState,
reducers: {
enableLoader: (state: LoadingState) => {
return {
…state,
loading: true,
};
},
disableLoader: (state: LoadingState) => {
return {
…state,
loading: true,
};
},
},
});
export const { enableLoader, disableLoader } = loadingSlice.actions;
export default loadingSlice.reducer;
3. create Store
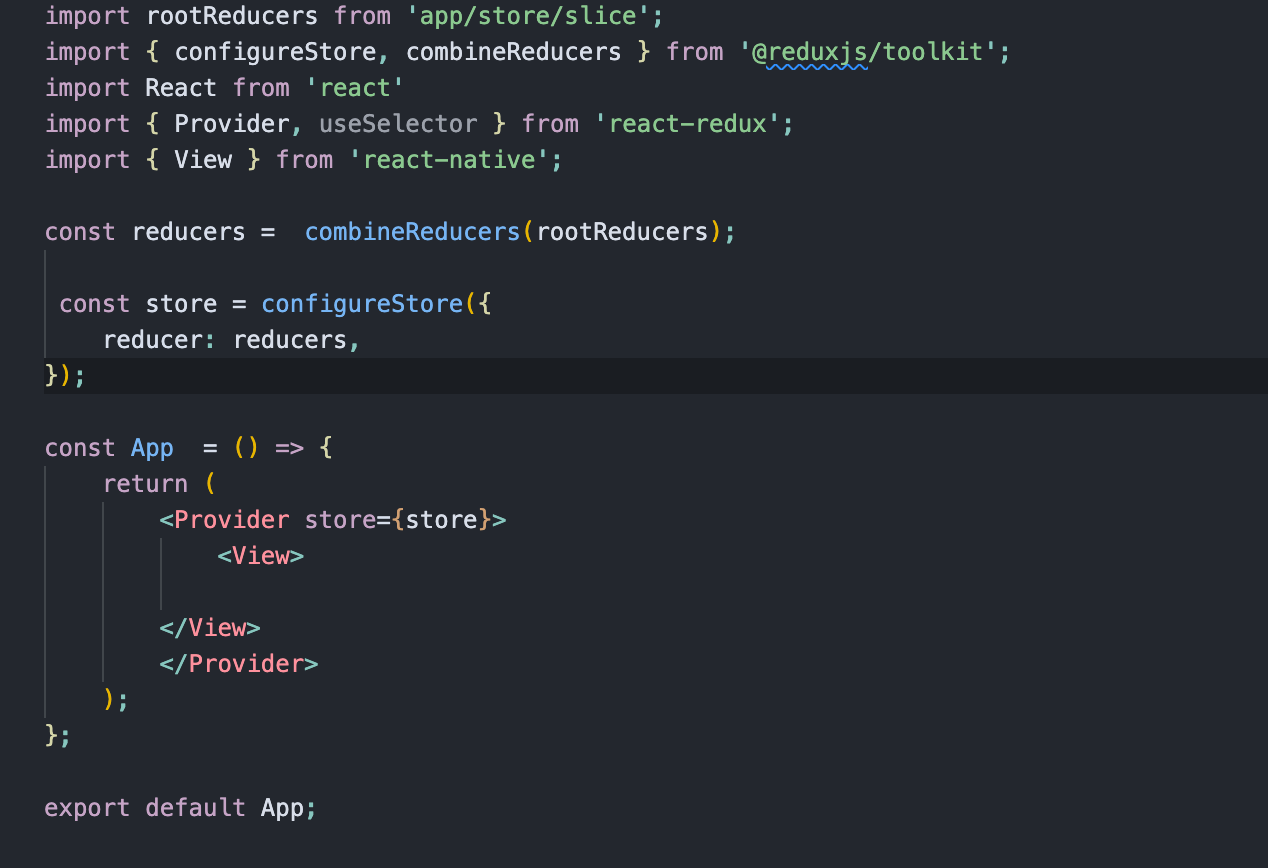
import rootReducers from ‘app/store/slice’;
import { configureStore, combineReducers } from ‘@reduxjs/toolkit’;
import React from ‘react’
import { Provider, useSelector } from ‘react-redux’;
import { View } from ‘react-native’;
const reducers = combineReducers(rootReducers);
const store = configureStore({
reducer: reducers,
});
const App = () => {
return (
<Provider store={store}>
<View>
</View>
</Provider>
);
};
export default App;
4.Now you can dispatch action and get value in your project ,
5. for further visit Part 2
https://ahtisham-adroitix.medium.com/how-to-persist-redux-store-using-redux-toolkit-part-2-c844580eb1b5
1.click here for configure store from scratch using redux toolkit
2.click here for configure persist store using redux toolkit
3.click here for configure middleware using redux toolkit
4.click here for configure redux-logger using redux toolkit